


Workshop Blog
How do you get the juice groove into the cutting board?

May
Would you like to know what a juice groove in a cutting board is good for and how you can cut a juice groove into your existing board yourself? Then you've come to the right place ✅
What is a juice groove for?
First of all, a juice groove on a Cutting board simply looks good. A juice groove is what makes a board a real cutting board. In addition to the modern and aesthetically pleasing appearance 🌟 The juice groove also has a special function.
The groove prevented, that leaking fruit and vegetable juice or Meat juice 🥩 runs onto the worktop or kitchen floor. Instead, the liquid collects in the groove and can be easily tipped out after cutting. Clean work is child's play.
Contents
Milling a juice groove afterwards
In general, we can recommend that you buy a cutting board with a juice groove from the start. Milling one in later requires practice, the right tools and full attention. The smallest mistake can mean that you no longer recognize your board. 🙈
If you are still motivated to invest in your existing Cutting board To mill a juice groove, we will show you what you should pay attention to, which tools you need and how to proceed. First of all, milling works best with a Router and the appropriate Parallel stop. More on this below.
Of course you can any type of wood mill a groove. However, it should be noted that hardwoods such as oak 🌳 or beech demand more from your tools than softer types of wood such as spruce 🌲 or birch. Processing is particularly demanding with End grain cutting boards. End grain has a particularly hard surface and is therefore even more difficult to work with.


What you should pay attention to
Against the milling direction
Before you start using your router, take a look at the Direction of rotation from the milling cutter. Milling cutter always against the running directionMilling in the direction of travel results in erratic guidance, tearing out of whole pieces of wood, an unclean milling surface and the risk of kickback.
Shallow depth
Depending on the depth of the juice groove, it may be useful to two steps Milling several millimeters in one operation results in an uneven guide and puts strain on you, the cutter and the machine. Work step 3 – 4 millimeters removal.
Clamp firmly
Since the router parallel stop is moved along the cutting board edge, a lateral pressure on the board. A Cover up from the board automatically leads to a warping of the router and the sap groove. Therefore it is very important that the board is clamped very tightly.
What you need
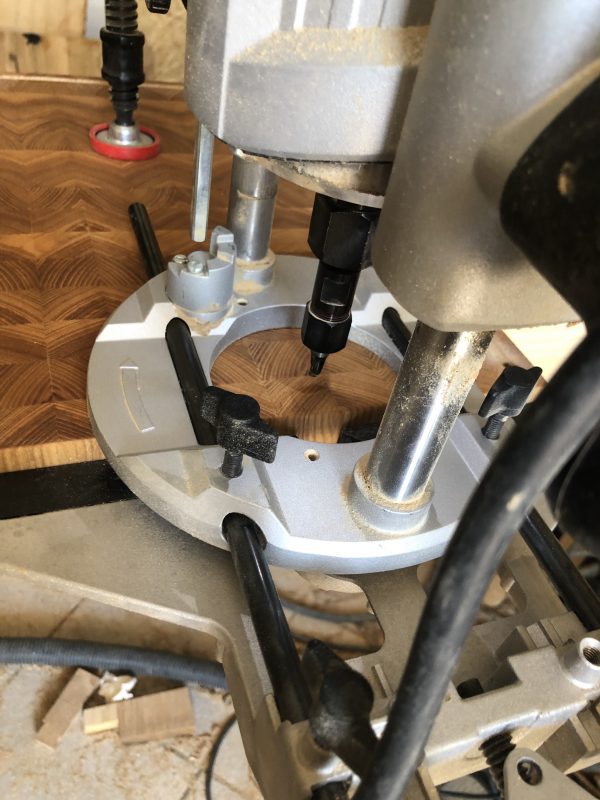
Since the juice groove is milled into the board from above, a router is recommended. If you don't have one yet, we can recommend the Bosch GOF 1600 router recommend. Fast cutter changes and powerful pull ensure the best results with this router.
As Milling cutters we use a high-quality Cove / sap groove cutter with 10mm diameter.
To clamp the board we use the good old Bessey screw clampsThe cast iron clamps do what they are supposed to and are extremely solid.
Last but not least, you need something Sandpaperto cleanly sand the milled edges and corners. We recommend using 180 grit paper.
Burn marks in the corners
The greatest danger that exists when milling juice grooves is Burn marks through the cutter; especially visible in the Corners. These appear when the cutter remains in one place for a longer period of time. Sometimes just one second is enough. The rapid rotation of the cutter creates heat 🔥, which is something wood has problems with.
Through a flying diving and exiting The burn marks can be prevented by using the milling cutter. This requires a high level of skill. It is easier to remove the marks afterwards with Sandpaper to treat. The stain is still not completely gone, but it is no longer as noticeable.
Another recommendation is milling in two stepsThe lower material removal means less friction and less heat is generated. Milling then takes twice as long, but burn marks can be reduced.

Steps to the juice groove
🗜 Clamp the board
Make sure that the board does not move and securely clamped But be careful, the parallel stroke must still be able to pass it. Through this receive you a clean and straight juice groove.
⛓ Adjust milling depth
Depending on how deep you want the juice groove to be (we recommend 5 mm), you should adjust the milling depth. If it is more than 5 mm, you should mill it twice.
✏️ Mark the milling distance
Draw yourself, how far you from the edge removed want to mill. This way you know how far you can mill while milling. You don't want to overshoot the target.
🛠 Milling
And action! Full concentration and against the direction of rotation, mill carefully and in one go. Try not to stop to avoid burn marks.
⚙️ Adjust the parallel stop
Adjust the parallel stop so that the juice groove runs the correct distance from the edge. Tighten the screws to fix the stop firmly so that nothing jerks.
👨🏻🔧 Grinding & Oiling
After the work is done, you can 180 grit sandpaper Sand the groove cleanly. This will remove small splinters and the groove will not be too sharp. After sanding, you should treat (wood oil).